Digital Portfolios: Step Three
Fireworks: The Basics (continued)

|| A. Get Acquainted with Fireworks || B. Modify a Picture || C. Save as PNG; Export as JPG ||
|| D. Make a Background || E. Save as PNG; Export as GIF ||

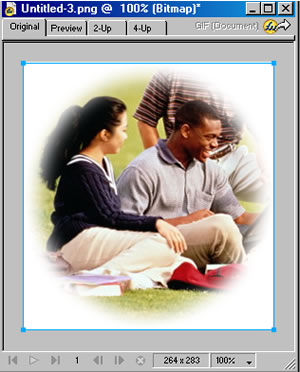
B. Modify a Picture (crop, resize)
GET A PICTURE

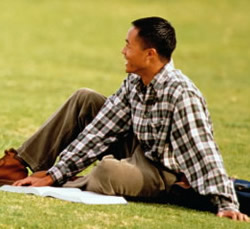
Most of you probably already know how to get images off the Web. Simply right click and save.

You can do this very procedure on the image below.

  • Place your cursor over the image
  • Right Click
  • Select Save Image As (or "Save Picture As" in Internet Explorer)
  • Save the image on your hard drive (remember where you saved it)
  • You may rename the image if you choose.


Figure 3B-1


Figure 3B-2


Figure3B-3


Figure 3B-4 (300 by 202 pixels)

RE-SIZE

You have saved the above photo on your hard drive. To Open it in Fireworks:

  • Click on (top toolbar) File--> Open (Figure 3B-1 )
  • Navigate to the image location on your hard drive and Select it

The image is too big. We want it about half that size.

To re-size an image:

  • Click on (top toolbar) Modify --> Canvas --> Image Size (Figure 3B-2)
  • Enter numbers appropriately

In this case, we entered 300 pixels for the width. As long as the Constrain Proportions box (lower left corner of Figure 3B-3) is checked, the height in pixels will change automatically to the correct proportionate number.

NOTE:

  • Bitmap images (such as photographs) can be reduced in size with no noticeable result in quality. If, however, they are increased in size, the result will likely be very poor.
  • Vector images (such as in drawings) can be reduced and expanded with no noticeable effect in quality


Figure 3B-5


Figure 3B-6

CROP

To crop a portion of an image:

  • Click on the Crop Tool. (Figure3B-5)
  • With your Mouse, Draw a rectangle around the part of the image you want to use (Figure3B-6)
  • Hit Enter
  • The result should be similar to Figure 3B-7


Figure 3B-7


Figure 3B-7

Figure 3B-8


Figure3B-9


Figure3B-10


Figure3B-11


Figure3B-12


Figure 3B-13

USE MARQUEE

The Marquee tool allows you to cut, copy, and paste selections from one image onto a blank canvas ( or onto another image). Further, the tool allows you to adjust the edges of the selection, such as in a "feather."

In the step-by-step below, we will :

  1. Acquire the Oval Marquee
  2. Edit the Edge to "feather 20"
  3. Select a portion of an image with the Oval Marquee
  4. Copy that Selection
  5. Paste that Selection onto a new canvas.

To Acquire the Oval Marquee

  • Click on the Marquee tool (Figure 3B-7)
  • If the rectangle is showing, click and hold the arrow to the right, then select Oval Marquee (Figure3B-8)

To Edit the Edge:

  • The Properties Inspector should have the Edge Control button visible (Figure3B-9)
  • Click on the arrow and select Feather
  • In the number next to Feather, enter 20 (Figure3B-10)
  • note: you can select any number you want; 20 is a good default for feathering; it determines the number of pixels wide the edge will "smear." If you want a clean cut of the image, select HARD.

To Select a portion of an image with the Oval Marquee:

  • With mouse cursor, draw a circle around a portion of the image (Figure3B-11 )

To Copy that Selection:

  • Click on (top toolbar) Edit --> Copy (or Keyboard Ctrl+C)

To Paste that Selection onto a new canvas:

  • Click on (top toolbar) and select File--> New
  • The properties in the New Document Dialog Box should contain the specifications for whatever you have in your clipboard (in this case, the copied section of the image)
  • Click on OK
  • Click on (top toolbar) Edit--> Paste (or Keyboard Ctrl+V)

The result should be similar to Figure 3B-13


Step Three Continued: C. Save as PNG; Export as JPG-->


© 2003 McDaniel College
Department of Instructional Technology
SAK 1/05/03