 Figure
2A-C
Figure
2A-C
Figure
2A-D
Figure
2A-E

Figure
2A-F
Figure
2A-G
 Figure
2A-H Figure
2A-H
|
There
are three ways to edit a table. Each method offers
different features.
First
Method: Simply look down at the
Properties Inspector. If your cursor is in a table, by default the
bottom half offers some table editing features. The features you
will use most often:
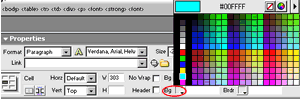
- changing
the background color and border color: click your mouse
in the appropriate cell, then click on the color swatch next to
Bg or Brdr (Figure 2A-C)
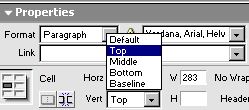
-
making objects appear at the top of the cell: place
your mouse cursor in the appropriate cell, click on the arrow
next to VERT, and select "Top" (Figures
2A-D)
Second
Method: Select the entire table with mouse cursor. Once
selected, the table will have "handles" and the entire
Properties inspector will change. The features you will use most
often:
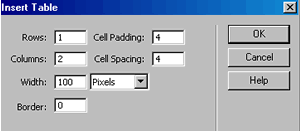
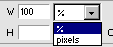
- change
width of table: enter
numbers in appropriate boxes. (Figure
2A-E) Make certain
you choose pixels or percent appropriately (see below)
- change
CellPad and Cell Space: enter
numbers in appropriate boxes (Figure 2AF)
- change
table border: enter number in appropriate box
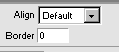
(Figure 2A-G)
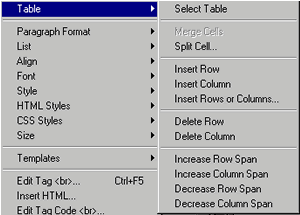
Third
Method: Right Click with your cursor in a cell table and
get the Table Editing Panel (Figure 2A-H).
The features you will use most often with this method:
- insert
row(s) or column(s)
- delete
rows(s) or column(s)
- split
cells into additional columns or rows
- merge
cells (the merge cell feature will appear when two or more cells
are selected with the mouse before right clicking)
|