Good Research is EASY…
This guide will show you how to make your research
easier…
faster…
better…
and fun!
Created for Middle School Students and Teachers
By
Mrs. Jennifer Sayre
July 2005
Table of Contents

Introduction.....................................................................................................1
STEP
1: DEFINE YOUR PURPOSE FOR RESEARCHING
What
makes a good research project?.....................................................4
How do I begin to research?........................................................................5
STEP
2: DEVELOP A RESEARCH STRATEGY
How can I search for the most useful information online?..................7
How
do I know that the information
I
find online is reliable and accurate?........................................................9
STEP
3: ACCESS DIFFERENT SOURCES
How
is our media center organized?..........................................................13
What research materials are available for me?......................................14
Primary
research
Digital and online
sources
Periodicals and
news sources
What
are the rules for safe use of
computers
in the media
center?...................................................................17
STEP
4: TAKE NOTES AND ORGANIZE THEM
How do I take notes?......................................................................................20
How
can I organize my notes into a research paper?.............................21
What is Plagiarism?.........................................................................................23
How
Do I Cite My Sources?..........................................................................25
STEP
5: SHARE YOUR INFORMATION
How do I edit, save and print my paper?...................................................28
What
are some ways that I can present my information?....................31
STEP
6: REFLECTAND EVALUATE
I’m
Finished! Now
What?..............................................................................35
1
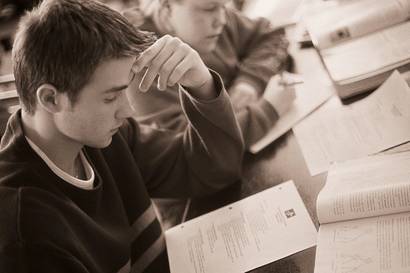
Introduction
Here at the
middle school level, you will begin to do more in-depth research projects for
many of your classes. This guide will
equip you with the tools that you need in order to do good research.
Goal #1: To
help students and teachers organize ideas on how to create and begin an
effective research project.
Goal #2: To
help students and teachers locate accurate and useful information from a
variety of sources.
Goal #3: To
assist students in knowing how to manipulate information that is found in the media
center.
Goal #4: To
encourage students and faculty to use effective research methods in the media
center, classrooms, and outside of school.

What
process should I follow when researching?
This
handbook is organized based on a 6-step process that all good researchers
use.
STEP 1: DEFINE YOUR PURPOSE FOR RESEARCHING: Learn how to get started and create essential questions for your
research topic.
STEP 2: CREATE A RESEARCH STRATEGY: List keywords and strategies for finding information about your
topic in sources, particularly online.
Find out how to evaluate the reliability of online sources.
2
STEP 3: ACCESS DIFFERENT SOURCES: Discover the many valuable sources available in the media center
and view policy for computer use.
STEP 4: TAKE NOTES AND ORGANIZE THEM: Learn different ways to take notes and become comfortable with the
process of outlining.
STEP 5: SHARE YOUR INFORMATION: Discover a variety of creative ways to present your
information. Review how to edit, save
and print research papers.
STEP 6: REFLECT AND EVALUATE: Determine ways that your research project (the process and/or
results) can be improved for next time.
Ready? Let’s Begin to Research!!

3
STEP #1:
DEFINE YOUR
PURPOSE
FOR
RESEARCHING
4
What makes a good research
project?
If
the only purpose of a research project was to find information on a certain
topic, one key aspect would be missing…lasting knowledge. While it is important that students
incorporate facts into a project, they need to manipulate the data in order to
make connections and draw conclusions.
Below are three ways to make research projects more effective.
1. Have a clear purpose: Students
need to know why they are researching.
Are they going to use the information to create a research paper? A poem, ballad, short story or epitaph? A powerpoint presentation? A poster?
2. Narrow the focus/scope: Having
a variety of topic possibilities in a project is great, but too much variety
can be overwhelming for students. Decide
on an acceptable time frame and/or location.
It is not effective to say “research a famous musician” because it is
too vague. Provide an example of topics
that are acceptable. At the same time,
expect that your students will come up with a great research topic that you did
not list. If it fits your chosen time
frame/location, consider their ideas.
3. Incorporate higher order thinking questions: The
project needs essential questions to keep students focused on higher learning
rather than overwhelming themselves with facts so that they can later
regurgitate them to the class. As a
teacher, what lasting knowledge do you want students to take from your
project? Here are some examples of
higher thinking questions that could be useful to a class researching a famous
person in American history:
How
did this person contribute to the good of his/her society?
How
did their contributions have a global impact?
What
qualities did this person have that you admire and why?
How
does this person’s traits/experiences compare with your own
traits/experiences?
Why
is this person worthy of study?
These questions cannot be found literally in any print or digital
resource, but they do rely on the students’ collection of accurate and reliable
information.
5
How do I begin to research?
Fill out this worksheet before you look at
any sources.
- What
is the purpose of the project?
- List
ideas for topics…you may want to browse through print/online sources to
find more ideas.
- Choose
a topic. Try to think of something
original that isn’t already taken by your peers.
- List
any words that you can think of that relate to this topic. Use a thesaurus to find additional words
- What
do you already know about your topic?
- What
do you want to know about your topic?
- What
ideas do you already have about how you are going to present?
6
STEP #2:
CREATE
A
RESEARCH
STRATEGY
7
How can I search for the
most useful information online?
Search
Tips and Baseball
See the connection??...You will!!
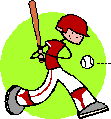
The
following tips for search engine use can be used by knowledge-seekers ages
(9-99). For this list of tips, I
have chosen to use baseball terms. These terms help to show the purpose
of each search tip. Beneath each tip is a "Strike",
which displays a mediocre search technique and a "Hit"
which suggests a better way to search. Hopefully, if you are a baseball
fan, these tips will be easy to understand AND remember!
1. KEEP
YOUR EYE ON THE BALL!! - FOCUS and BE SPECIFIC - The more
specific you are within your search, the better your results will be.
Instead of searching for "ball", you can immediately narrow
your search by typing "Baseball", "Softball",
"Football", etc. Then, make it even more specific:
"Major League Baseball playoffs".
Lets, apply this tip to social studies:
STRIKE:
Congress - This will give you THOUSANDS of results!!
HIT:
Second Continental Congress - This will narrow your search and save you
time!
2. "PLAY
BALL!!" - Quote Exact Phrases - If you do not use quotes,
the search engine will give you all results that include any of the words that
you enter.
STRIKE:
A Day Which Will Live In Infamy - The
search engine will find anything with one or more of the words "Day",
"Which", "Will", "Live", "In",
"Infamy"
HIT:
"A Day Which Will Live In Infamy" - The
search engine will only look for results with the phrase "A Day Which Will
Life In Infamy"
8
3. USE YOUR TEAMMATES!
- Use multiple search engines...there are some search engines that are
designed for specific purposes (shopping, education, media, kids, news and
more!.) See my list of favorite search
engines for help.
http://www2.mcdaniel.edu/slm/student/sayrej/engines.htm
STRIKE:
You use only Google and Yahoo since they are your favorite and are
popular - You are missing out on possible search results!!!
HIT:
You use a variety of search engines - You will find USEFUL results quickly!
4. QUALIFY who makes it to
the next round! - Just as baseball coaches may need to add or cut
members of the team, you can enhance the quality of your search with Boolean
terms, like conjunctions (and, or, not). Make use of the conjunctions
"AND", "OR", and "NOT" to refine your search
without using the advanced search feature. Use "AND" if you are
looking for multiple words, "OR" to find results for a synonym for
your initial word, or "NOT" to exclude any unwanted words.
STRIKE:
Going against slavery
HIT:
"Slavery" AND "Abolitionists"
"Abolitionists" OR "Anti-slavery"
"Abolitionists" NOT "Civil War"
4. ADVANCE to the next
level! Make use of Advanced Search function on search engines to
continue to refine your search. Some advanced search engines allow you to
search by date, language, media type and MORE!! Advanced Search functions
can usually be found as a link on the search engine's primary site.
STRIKE:
Use only basic search engines - Your results will be either too vast or too
limited
HIT:
Use advanced search engines - Find exactly what you want!
Created by Jennifer Sayre
Fall 2004
9
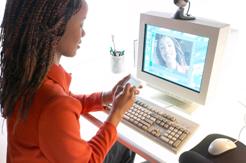
How do I know that the
information I find online is reliable and accurate
Teachers: Here is an example of an
activity that can be used to instruct students on finding reliable sources.
Students: Read the
criteria used in the chart. These are
the things that you should find on a website that is reliable. If you do think you have found an unreliable
source, or are not sure, please see Mrs. Sayre or an assistant for additional
help.
Lesson Title: ELVIS IS ALIVE!!!
Grade Level: Middle/High School
VSC Standards
Addressed: 3.A.5.: Evaluate the content
of specific non-print resources to determine accuracy and relevance of content.
Sources: http://www.elvis-is-alive.com/
Internet Public Library: Biographies- http://www.ipl.org/div/subject/browse/ref15.00.00/

www.fiftiesweb.com/
elvis.htm
Description of the Lesson:
1. To begin this lesson, ask the students if they had
ever heard of Elvis Presley (you may want to play a song to jog their
memory). Next, tell them excitedly that
you have found proof that he is still alive!! Proudly
explain that he’s working undercover for the federal government!
Then, pull up the following website on the Internet: http://www.elvis-is-alive.com/ After revealing to them that Elvis is
actually dead, ask them the following questions: Why does this website
exist if the information is not true?
How would anybody who doesn’t know anything whatsoever about Elvis know
the difference?
2. At this point, explain how the Internet is a space
for people to post whatever information that they want, true or false. When students use Google, Yahoo!, or other
search engines these sites get mixed in with the reliable ones because they
contain the keywords that we ask for.
This means that we need to be very careful when researching any topic on
the Internet. Explain how most reliable
sites contain a URL that ends with .gov and .edu. Note:
.net, .com and .org can be just as reliable, but take extra precautions
as they are
10
sometimes
biased towards a certain standpoint since many are created by individuals or
organizations with a particular agenda or bias.
There are ways that we can check to see if a source is actually
accurate.
Determining the Reliability of Sources on the Web
|
Criteria
|
Site #1:
|
Site #2:
|
Site #3:
|
Site#4:
|
|
What is the
author’s name? Is it an organization?
|
|
|
|
|
|
Does the
author provide contact information?
|
|
|
|
|
|
When was the
site first published?
|
|
|
|
|
|
When was the
site last updated?
|
|
|
|
|
|
Who is the
intended audience? (formal or
informal)
|
|
|
|
|
|
Are there very
few spelling/grammar errors?
|
|
|
|
|
|
Can you verify
that a fact is true on at least 2 other websites? (List websites)
|
|
|
|
|
11
3. At this point in the lesson, give students some
hands-on experience with the Worldwide Web by having them go to the Internet
Public Library and choose 4 biography sites to visit to fill in the reliability
chart shown above. The person that they
should find information for is Elvis.
Require them to list the following information:
a. When was Elvis born?
Where?
b. Who was Elvis’ wife?
Any kids?
c. Where did Elvis live?
d. Name 3 of Elvis’ hit songs
e. When did Elvis die?
How?
Internet
Public Library Biography Sites: http://www.ipl.org/div/subject/browse/ref15.00.00/
4. To summarize the activity, have students share their
experience with the group and then discuss the following questions:
Which sources were the most reliable? How do you know?
How does knowing how to evaluate resources online help you in your
research? In your web-browsing outside
of school?
12
STEP
#3:
ACCESS
DIFFERENT
SOURCES
13
How is our media center
organized?
The
media center contains many useful resources if you know where to find
them. Below is a map of our media
center. For additional assistance, see
Mrs. Sayre or a media assistant.
The Media Center at East Middle School
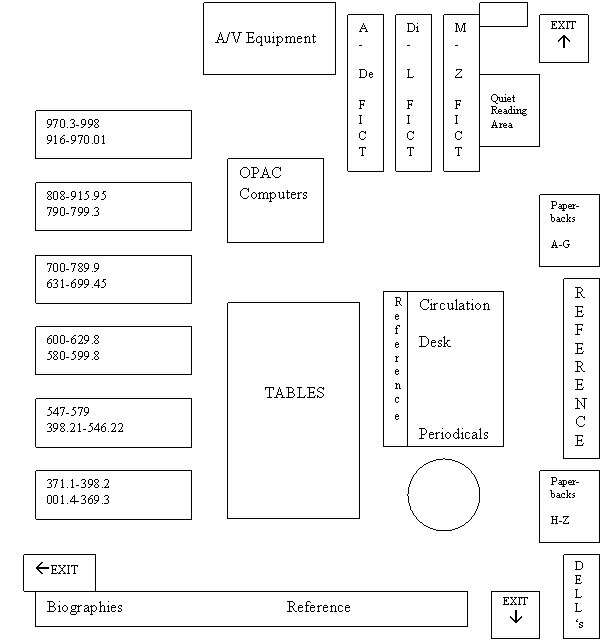
East Middle
School Laurie
Walters, Media Specialist
121 Longwell Avenue Kay Alexander, Media
Clerk
Westminster, MD
21157 http://www.carrollk12.org/ems/media/mediaindex.htm
410-751-3656 Map created by Jen Sayre, 2005
14
What research materials are
available to me?

Here are the
basic reference materials that you can find in our media center…
I.
Primary
Reference Materials
1.
Encyclopedias
1.
The New Book of
Knowledge. Danbury,
CT:
Scholastic Library Publishing, Inc., 2004. 21 vols.
2.
World Book
Encyclopedia. Chicago: World Book, Inc. 2004. 22 vols. Also available: 2002, 2000, 1998 and 1997 editions.
3.
World Book
Student Discovery Encyclopedia. Chicago: World Book, Inc. 2000. 13 vols.
2.
Dictionaries/Thesaurus
1.
Roget’s
International Thesaurus 5th ed.
HarperCollins, 1992.
2.
The American
Heritage Student Dictionary. Boston:
Houghton Mifflin, 2003.
3.
Random House
Webster’s Unabridged Dictionary. New York:
Random House, 1998.
3.
Almanacs/Fact books
1.
World Almanac and
Book of Facts. Cleveland: World Almanac Books, 2005.
2. Guinness World Records. London: Guinness World Records Inc, 2005.
4.
Science Research Sources (REF 500’s)
1.
The Grolier
Encyclopedia of Science and Technology.
Danbury CT: Grolier Educational Corporation, 1994. 13
vols.
2.
The New Book of
Popular Science. Grolier
Incorporated, 1994. 6 vols.
3.
The Raintree Illustrated
Science Encyclopedia. Austin,
TX:
Steck Vaughn Company, 1991.18 vols.
15
4.
The World Book
Encyclopedia of Science. Chicago: World Book, Inc. 2000. 8 vols.
5.
The American
Heritage Student Science Dictionary. Boston: Houghton Mifflin, 2000.
6.
Earth Science: Discovering
the Secrets of the Earth. Danbury,
CT: Grolier Educational Corporation, 2000.
8 vols.
7.
The World of
Mammals. Danbury,
CT:
Grolier Inc., 2003. 10 vols.
8.
The Marshall
Cavendish Encyclopedia of Health. New York:
Marshall Cavendish, 1991. 14 vols.
(found in reference as R 160 MAR)
5.
Arts Research Sources (REF 700-780s)
1.
The Encyclopedia
of Visual Arts. Danbury,
CT: Grolier Educational Corporation, 1983.
10 vols.
2.
The Oxford Companion to Music, 10th ed.
London: Oxford
University Press, 1970.
6.
Sports Research Sources (REF 796)
1.
The Lincoln Library of Sports Champions. Cleveland: Lincoln
Library Press, 2004. 14 vols.
7.
Social Studies Research Sources (REF 900-912)
1.
The World Book
Encyclopedia of People and Places. Chicago:
World Book, Inc., 2002. 5 vols.
2.
Junior Worldmark
Encyclopedia of the Nations 4th ed. Detroit:
Thomson Gale, 2004. 10 vols.
3.
Junior Worldmark
Encyclopedia of World Cultures. Detroit:
UXL, 1999. 9 vols. (REF 306)
4.
Renaissance. Danbury
CT: Grolier Educational Corporation, 2002. 10
vols.
5.
The World Almanac
World Atlas 1st ed. Canada:
Hammond World Atlas Corporation, 2004.
6.
Atlas of World
Geography. Rand McNally and Company, 1996.
8.
Biography Sources (REF 920)
1.
African American
Biography. Detroit: UXL, 1994.
6 vols.
2.
Authors and Artists
for Young Adults. Detroit: Gale
Research Inc., 1989. 59 vols.
3.
Biography Today.
Detroit: Omnigraphics, Inc., 2004.
4.
Middle Ages
Biographies. Detroit: UXL,
2001. 2 vols.
5.
Notable Women
Scientists. Detroit: Gale
Group, 1999.
II.
Digital
and Online Sources
1.
OPAC- Our
online card catalog
2.
SIRS Knowledge
Source http://sks.sirs.com See librarian for username and password.
3.
World Book Online http://www.worldbookonline.com/
See librarian for username and password.
16
4.
See Databases available at Carroll County Public
Library, which are free to you if you have a library card (also free!) Your password for the databases is the number
on the back of your library card. http://www.ccpl.org
III.
Periodical
and News Sources- All current issues available
1.
American Cheerleader
2.
BMX Plus
3.
Better Homes
and Gardens
4.
Biography
5.
Car Action
6.
Code One
Airpower Projection Magazine
7.
Cycle World
8.
Dig
9.
Dirt Bike
10. Dirt Wheels
11. Girls Life
12. Hot Rod
13. Kids Discover
14. Lacrosse Magazine
15. Motor Trend
16. Mountain Bike
17. National Geographic
18. National Geographic Kids
19. Newsweek
20. Nintendo Power
21. Outdoor Life
22. People
23. Popular Science
24. Reader’s Digest
25. Shoen Jump (Anime)
26. Smart Computing
27. Smithsonian Magazine
28. Sophisticate’s Hair Style Guide
29. Sports Illustrated
30. Sports Illustrated Kids
31. Sweet 16
32. Time
17
What are the rules for safe
use of computers in the media center?
Dear
Parents/Guardians,
As you may or may not
know, our school provides students with Internet access to complete class
assignments/projects. The Internet can be a valuable tool for both
teaching and learning, as students have the capability of accessing a vast
amount of information. Realizing that there are also many ways for people
to use the Internet for unethical and even purposes, it is necessary for our
school to limit what students can access.
Our school system has
a filtering system which blocks websites that contain inappropriate
material. Unfortunately, some websites get past the filters. If
your child finds such a site, he/she is aware that they must notify a teacher
immediately. Second, our students are directed toward sites which are
factual and used solely for educational purposes. A teacher will be in the
room to monitor Internet use at all times.
We ask for your
support with having students use the Internet respectfully and ethically while
working on projects in school and while continuing to work on those projects
outside of school. Please read through and discuss the attached Internet
Safety Checklist with your child and return the checklist with the appropriate
signatures as soon as possible. Feel free to contact the school if you
have any questions or concerns. Again, thank you for actively promoting
safe Internet use in our schools!
Sincerely,
Jennifer
Sayre
Jennifer
Sayre
Team 3 Social
Studies
18
Internet Safety Checklist

________________________, has
been informed about the proper use of the Internet while at school and is aware
that Internet privileges may be taken away at any time if they are not abiding
by the following guidelines. (Students: Check off each guideline
below after you have discussed them with your parent/guardian)
______
I know that I must be logged in under my user name (not someone else's)
in order to use the Internet.
______
I will only use the Internet for educational purposes (projects, research)
while at school.
______ I will only visit websites on the Internet that have been approved
by my teacher.
______ If I accidentally visit a website that is not approved, or if
anything unusual happens while I am online, I will notify my teacher
immediately. I realize that I am responsible for what happens on the
computer while I am online.
______ I will respect the computer and other school equipment that I use.
______ I will print material only after it has been approved by my
teacher. I will not print large quantities of material that may waste
paper and even damage printers.
______ I will not give out any personal information (address, phone
number, social security number) to a website.
______ I will use the Internet for a minimal amount of time (no more than
30 minutes) to give others a chance to use it.
______ I realize that Internet use is a privilege which can be taken from
me if abused.
______________________
________________________ ______________________
Student
Signature
Parent/Guardian
Signature
Teacher Signature
19
STEP #4:
TAKE AND
ORGANIZE
NOTES
20
How do I take notes?
The great
thing about taking notes is that there are many options to fit your needs. Below are examples of strategies that you can
use.
1. Post-Its: If you are taking notes on a book that you
have checked out, this is a good idea.
As you read, if you come to something that you think is important,
briefly describe what it is on a Post-It and stick it on the page where you
found the information. Be sure to take
all sticky-notes out before returning the book!
2. Note Cards: Make a note card for every source, writing
down citation info and notes. Or, make a
note card for every key point/key question you want answered (example:
education, accomplishments, etc.) If you
do note cards by topic, it is easier to organize your info for your 1st
draft.
3. Notes-Summary-Source Chart: Copy down key
information, then put the information in your own words and list the
source. This is good practice in
avoiding plagiarism.
4. K-W-L Chart: This is commonly used and
self-explanatory.
|
What I Know
|
What
I Want to Know
|
What
I’ve Learned
|
|
|
|
|
5. Copy & Highlight:
Some students like to make a copy of a lengthy information book so that they
can highlight important information.
Then, go back and take notes on what you highlighted.
21
How do I organize my notes
into a research paper?
One of the most
common ways to organize notes is through outlines. If you can complete this outline without any
problem, it will seem as if your 1st draft is “writing itself”!
I.
Introduction
A. Attention-Getter: Find
a way to get your reader interested by using a famous quote, asking a question
or making an important statement about your topic.
B.
Thesis Statement: This is the
most important feature of your paper because it shows the reader what you are
trying to accomplish. What’s your point?
II.
Body
A.
Main Idea: Create
a topic sentence that reveals what this first paragraph is about.
1. Supporting
Evidence: State
the facts and describe why they are important.
2.
Supporting Evidence
B.
Main Idea: Since
you are moving on to a new idea, use a transition word (Second, However, Next,
etc.) to begin your topic sentence.
1.
Supporting Evidence
2.
Supporting Evidence
C.
Main Idea: Don’t
forget those transitions!
1.
Supporting Evidence
2.
Supporting Evidence
D.
You may have more main ideas/key points to cover. Make sure that you continue to use the same
format as you did for other main ideas.
22
III. Conclusion
A. Re-stating
Thesis: Think
back to your thesis statement at the beginning.
Create a statement that reveals how you achieved the purpose of your
paper.
B.
Final Thoughts/Connection: If you can apply experience from prior
knowledge or connect real-life situations to your main topic, this is a good
place. Leave a lasting impression on
your reader.
Note: Do not put complete sentences for everything
on the outline, except for important pieces like the thesis statement. Put down important phrases that will help you
when actually writing your 1st draft.
Activity: Now that you have seen how outlining works,
let’s give it a try! Create a short
outline on your life. Here is Mrs.
Sayre’s example:
I. Introduction
A. “Life is Like a Box of Chocolates”…quote from
Forrest Gump
B.
Over the years, I have realized that family, travel and learning are
very important to who I am.
II.
Body
A. Spending
time with family and friends is very important to me.
1. Weekly
visits/phone calls
2. Large
get-togethers/reunions
B. In
addition to family, I have found that I enjoy traveling.
1. Mexico
2. Europe
C. Finally,
I have developed a passion for learning.
1. reading
2. teaching
3. student
III.
Conclusion
A. Family,
travel and learning has been, and will always be, a significant part of my
life.
23
What is plagiarism?
Plagiarism:
the unauthorized use of the language and thoughts of another author
and the representation of them as one’s own. Webster’s
Universal College Dictionary, 1997
|
|
What is
plagiarism? When someone uses an author’s words or ideas
without permission, it is known as plagiarism.
Plagiarism has become one of the greatest problems in research, because
it is so easy to do. Many students think
of it as the “copy and paste” method. It
is so easy to copy words out of a book or online and put them on your
paper.
What’s so bad
about plagiarism? By copying someone else’s work, you are
violating copyright laws. When you see
the copyright mark ©, that means that you may not take anything without
permission from the author. Sometimes,
this means paying a small fee. Other
times, authors simply ask that you write their name and website address
underneath whatever you borrow. Just
remember: if you take anything without
permission, you are breaking the law. In
many colleges, students who are caught plagiarizing are expelled. While this is not the case at the middle
school level, students who plagiarize are given a zero on their project and
parents and administration are contacted.
How do
teachers know if a paper has been plagiarized? While it only takes a few minutes to
plagiarize, it also only takes teachers a few minutes to detect it. How do they know? Here are some warning signs that all teachers
should look for:
24
1.
Is
the language in the paper similar to what the student uses on other assignments
in class, or like a college professor?
(In middle school, students are not expected to write like they are
professionals)
2. Have the student read the
paper to you out loud (if there is not already an oral presentation for the
class). Is he/she stumbling over
vocabulary frequently and having trouble reading through the paper? Have the student read one or two sentences that
you choose. Ask them what it means in
their own words. Are they having
difficulty with this?
3. Before sending students
off to begin their research, talk to them about plagiarism. Know your system’s policy. Explain the consequences…be consistent!!
If I change a
few words then the work no longer belongs to the author, right? WRONG!
The definition of plagiarism states that it includes the use of an
author’s words OR ideas! If you want to use the thoughts or words of an author,
you MUST quote it and list it on your work cited page. Give credit to any source that you directly
or indirectly refer to in your paper.
The bottom line on the issue of plagiarism:
While it is easy, it is also not worth it!
25
How do I cite my sources?
There
are two reasons why it is necessary to cite your sources when researching: to give credit to the sources that you used
and to allow people reading your paper to know where to look for further
information on your topic. There are a
variety of formats that people can use to cite sources. Our school uses the Modern Language
Association or MLA style. Here is a
guide to the basics of MLA style.
Books
Author(s). Title of Book. Place of Publication:
Publisher, Year of Publication.
One Author
Doe, John. Doe’s Book Title. Nowhere: Publish Inc.,
2005.
More than One Author
Doe, John, and Bob Smith. John and Bob’s Cool Book.
New York: Publish Inc., 2000.
Article from a reference book
"Tarantulas." Encyclopedia Britannica.
2000 ed.
An article in a periodical (such as a newspaper or magazine)
Author(s). "Title of Article." Title of
Source Day Month Year: pages.
Example:
Doe, Jane. "Important News." People 13 Sept. 2004: 20-21.
An article in a professional journal
Author(s). "Title of Article." Title of Journal Vol (Year):
pages.
26
Website
Author(s). Name of Page. Date Created/Revised. Name of
institution/organization connected with the site. Date of Access <web
address>.
Web site examples
Doe, Jane. “The Sea Turtles”. 5 Oct. 2001. University
of Maryland. 21 Apr. 2005 <http://www.seaturtles.umd.edu>.
For
more information about MLA Style, see the following sources:
The Write
Source. This site provides
additional examples of how to use MLA style.
From the homepage, you can also find APA Style and other research tips. Accessed
on 18 July 2005.
<http://www.thewritesource.com/mla.htm>.
EasyBib.
This site automatically creates a citation for you, but be careful to
check the results! Choose what type of
source you are citing and the rest is easy.
Accessed 14 July 2005.
<http://www.easybib.com/>
Modern Language
Association. Learn more about MLA from
its creator! Accessed 14
July 2005.
<http://www.mla.org>

27
STEP #5:
SHARE
YOUR
INFORMATION
28
How do I edit, save and
print my paper?
Editing:
1.
Self
edit #1- read the paper to yourself out loud.
Make any corrections needed. If
you have a rubric, look at it. Does your
paper meet all of the requirements?
2.
Peer
edit- have someone else read your paper.
Ask them to be honest and allow them to mark corrections/questions on
your paper with a colored pen.
3.
Self
edit #2- look at what your peer has written on your paper. Talk to them about what is good and what
needs to be fixed. Check for
spelling/grammar errors.
4.
If
you are using a word processor to type your final copy, make use of its
spell-checker. BEWARE: not all of its suggestions are correct and it
may not always pick up on basic error.
–Notice in the last sentence that the spell check did not see that
“error” should be plural.
29
Saving:
1.
For
Microsoft Word, click on FILE and select SAVE AS. Be sure that you are saving on the correct
student drive. See Mrs. Sayre for
help.
2. Think of a simple file
name- NO MORE THAN 8 characters. Do not
use any symbols. Make sure that you give
it a name that you can find later. You
may want to write it down. If your paper
is about fossils, it would be wise to name your file fossils.doc –You do not
have to put the .doc part on since Microsoft Word does it automatically…just
know that when you look for it later it will appear as fossils.doc
3. Select SAVE
4. As you work, you want to
SAVE FREQUENTLY! Sometimes, computers
will crash and you will lose anything that has not been saved! If you are at home, it would also be wise to
create a backup file on a floppy disk.
See Mrs. Sayre for more information about this.
Printing:
1.
BECAUSE
OF A SHORTAGE OF PAPER AND PRINTER INK, ALWAYS NOTIFY MRS. SAYRE OR ANOTHER
SPECIALIST BEFORE PRINTING!
2. Some websites are
formatted to print more pages than necessary.
If you want to print something from the Internet, open up Microsoft
Word. Then, go to your website and
highlight only the parts that you want printed.
Go to the top menu and select EDIT and COPY. Then, go to the blank
30
document on Word and select EDIT and PASTE on its
main menu. BEFORE YOU GO ANY FURTHER, go
back to your webpage and highlight the web address in the white box. Copy and paste it onto your Word document
just like you did before. This
guarantees that you have the website so that you can go back later and get the
citation information.

31
What are some ways that I
can present my information?
This page is for
teachers/students who are looking for new ways for students to present research
information. Included are presentations suitable for individuals, partners and
groups.
1.
Reading a
Research Paper-
This is what is traditionally done, but it does not appeal to the
audience. (The entire class would learn
more from a more creative way of presenting)
2. Poster- This is effective if
students do not read from the poster.
Note cards would be helpful for this type of presentation. Students should be encouraged to print
largely so that students can see, and post up the poster after the presentation
for additional viewing.
3. PowerPoint- Ask that students do not
write everything that they plan to say on PowerPoint slides, as it limits eye
contact and volume. Instead, have key
ideas on the slides that students can use as a guide and then explain the
details. If resources are not available
in the classroom, feel free to sign up to use the media center for
PowerPoint.
32
4. Drama/Skit- It is amazing how many
kids enjoy this option. Encourage
costumes and props. To make sure that
this is well-planned, require a written copy of the skit to be handed in prior
to the presentation. This works well if
students are not actually holding their scripts. Note cards or notes on props allow students
to have their hands free to act. In the
past, musically-
inclined students have done a musical, which also works very well. Sometimes, students prefer videotaping over a
live performance.
5. Children’s Books- This is a good option
for students who are creative writers/artists.
Create a fiction story that revolves over facts about a particular topic
or create a nonfiction information book that includes illustrations. For this project, it is wise to set a minimum
page requirement. Students will read
their book for the class.
6. Pamphlets/Brochures- This is a simple way to display what has been
learned. Encourage creativity through
illustrations, make-believe advertisements and contact information. Post on a bulletin board for class to view.
7. Diorama- This is great for students who enjoy hands-on
creativity. Set limits on the minimum
and maximum size. Suggest that students
use scrap materials and things at home to prevent spending too much money. Display in class for closer view.
8. Mini-Lesson- Students love to be the
teacher for a day! Require that they
teach and assess information. This can
be done through student designed worksheets, games, or quizzes. Many students ask to collect their work and
grade it (teachers can decide whether or not it will count) for the full
“teacher” experience.
33
9. Talk Show/Interview- This can be similar to a
drama with a written skit. Or, students
can tape an actual interview with someone relevant to the topic. Require that students turn in a copy of their
questions as well as a summary/reflection of answers given.
10. Exhibition- This can be one of the most
time-consuming but rewarding presentation methods. Teachers can have the entire class create a
presentation board and be prepared to speak about their topic. Students are set up at different stations and
parents, staff and other students may be invited to travel from station to
station.
Note: All of these methods require good eye contact
and volume. Teachers, please model good
eye contact and volume, and incorporate it into your presentation rubrics.
34
STEP #6:
REFLECT
AND
EVALUATE
35
I’m Finished! Now What?
Research projects NEVER turn out to be perfect so it’s important
to consider ways to improve. All good
researchers should REFLECT and EVALUATE the PROCESS and the RESULT of their
research in order to prepare themselves for the next research project!
REFLECT
What aspects of the research process were
successful/unsuccessful?
What methods or results did I see
from my peers that I liked?
EVALUATE
Did I fulfill my purpose for research and successfully answer all
essential questions?
What are my research strengths? Weaknesses?
How can I
improve for next time?
Now, you are
ready for the next time that your teacher announces that you have a research project!!